Why Replace the KVM SPC560B60L3 Chip?
When a Jaguar Land Rover Keyless Vehicle Module (KVM) fails, the vehicle is completely immobilized. The dealer quotes $2,000+ and a 3-week wait. With the right tools and this guide, you can renew a used module in-house the same day.
One-Time Programmable (OTP)
The SPC560B60L3 MCU inside the KVM stores vehicle-specific security data in OTP memory. It cannot be erased or rewritten to a virgin state via OBD or standard diagnostics.
Used Module Rejection
A KVM from a donor vehicle is cryptographically paired to that car. The ECM and BCM will reject it unless the security data is cleared and synchronized using engineering tools.
Component-Level Repair
By physically replacing the SPC560B60L3 chip with a new virgin unit, you bypass the OTP lock. The module becomes a blank slate, ready for anti-theft synchronization.
Tools & Parts You Need
Everything required to complete the KVM renewal procedure from start to finish. Each component is available in our shop.
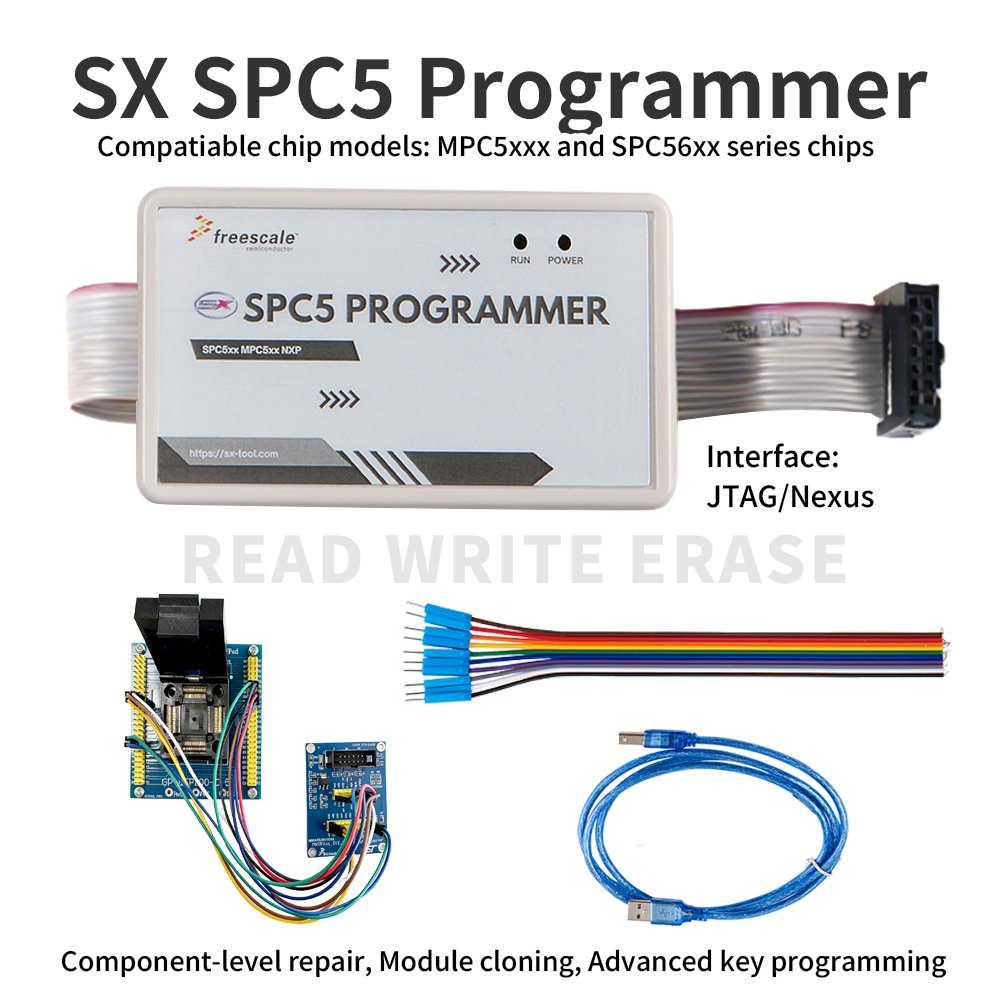
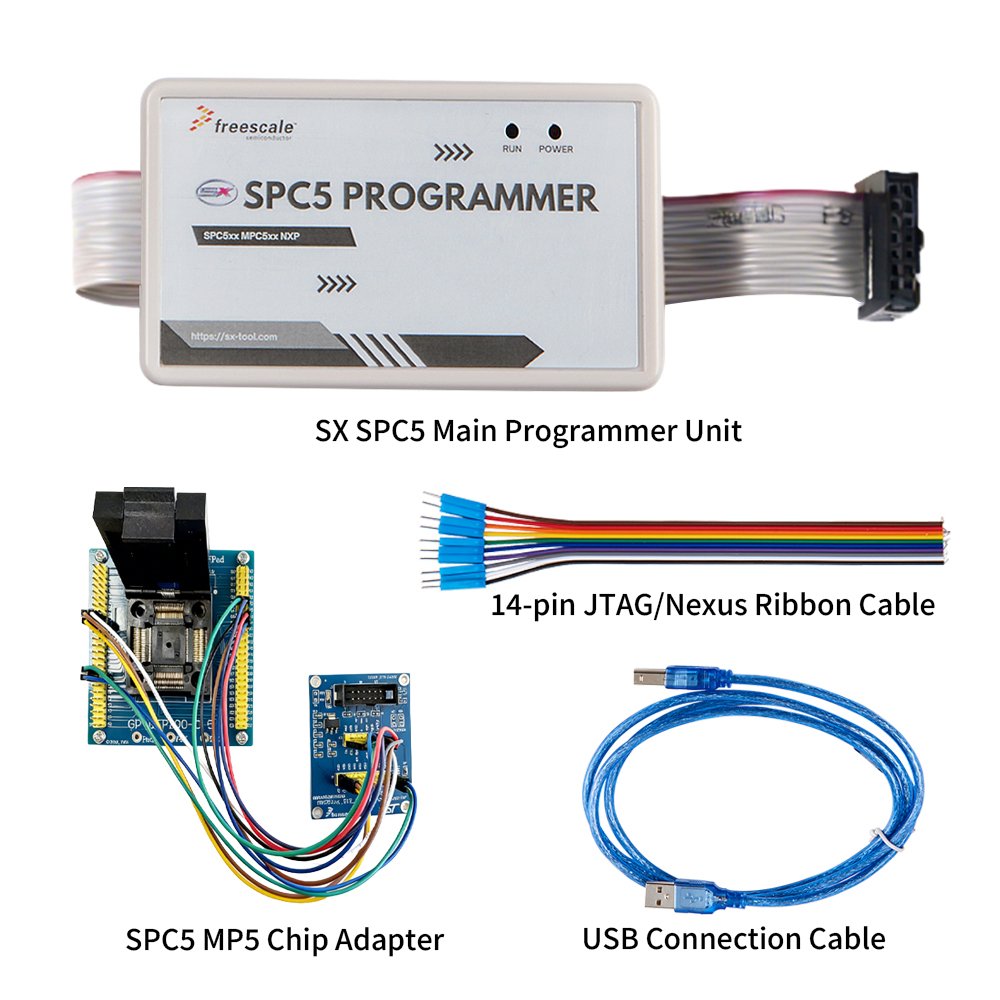
SX SPC5 Programmer + Adapter
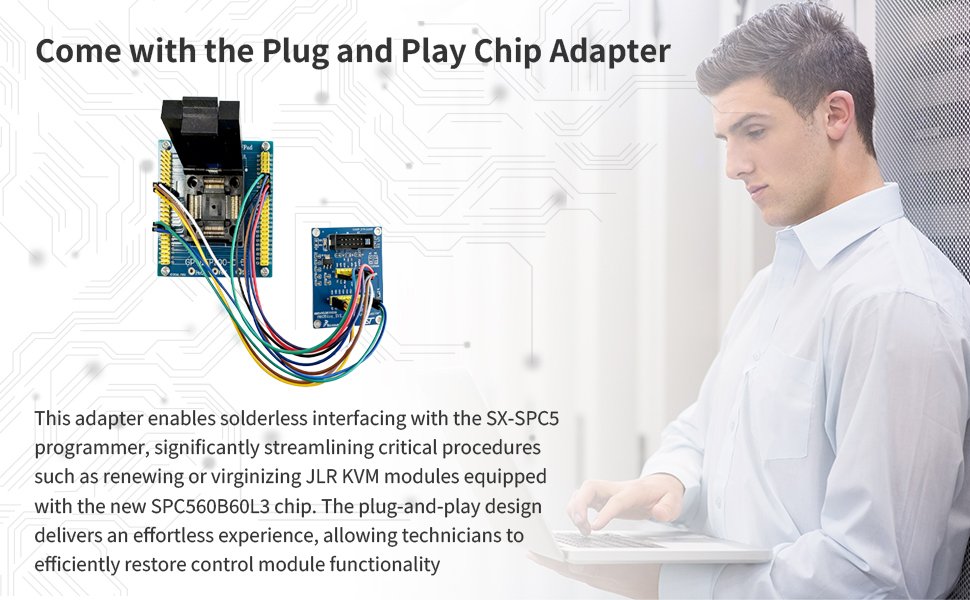
JTAG/Nexus interface for reading, erasing, and writing SPC560B60L3 flash and EEPROM. Includes chip adapter for socketed programming. Buy JET Master →
Brand New SPC560B60L3 Chip
ST automotive-grade 32-bit Power Architecture MCU. Must be new and blank. We supply virgin chips in original reels.
Virgin EEPROM .s19 File
The virgin firmware data written to the new chip. This file configures the KVM as an unmarried, blank module ready for pairing. Get EEPROM Service →
Soldering & Rework Station
Hot air gun with fine nozzles, solder paste, flux, tweezers, and a PCB holder. Precision is critical for LQFP-100 packages.
JLR DOIP VCI
Engineering diagnostic interface with DOIP support. Pair with JET Master SX-TOOL or JET-PRO for KVM Replacement wizard and automated immobilizer handshake. Buy VCI →
Stable Power Supply (12.5V+)
A battery maintainer or regulated PSU is essential during programming and sync. Voltage drops will brick the procedure.
The 4-Step KVM Renewal Procedure
Follow these steps in order. Total workshop time is under one hour once you are familiar with the workflow.
Remove the Used SPC560B60L3 KVM Chip from the Module
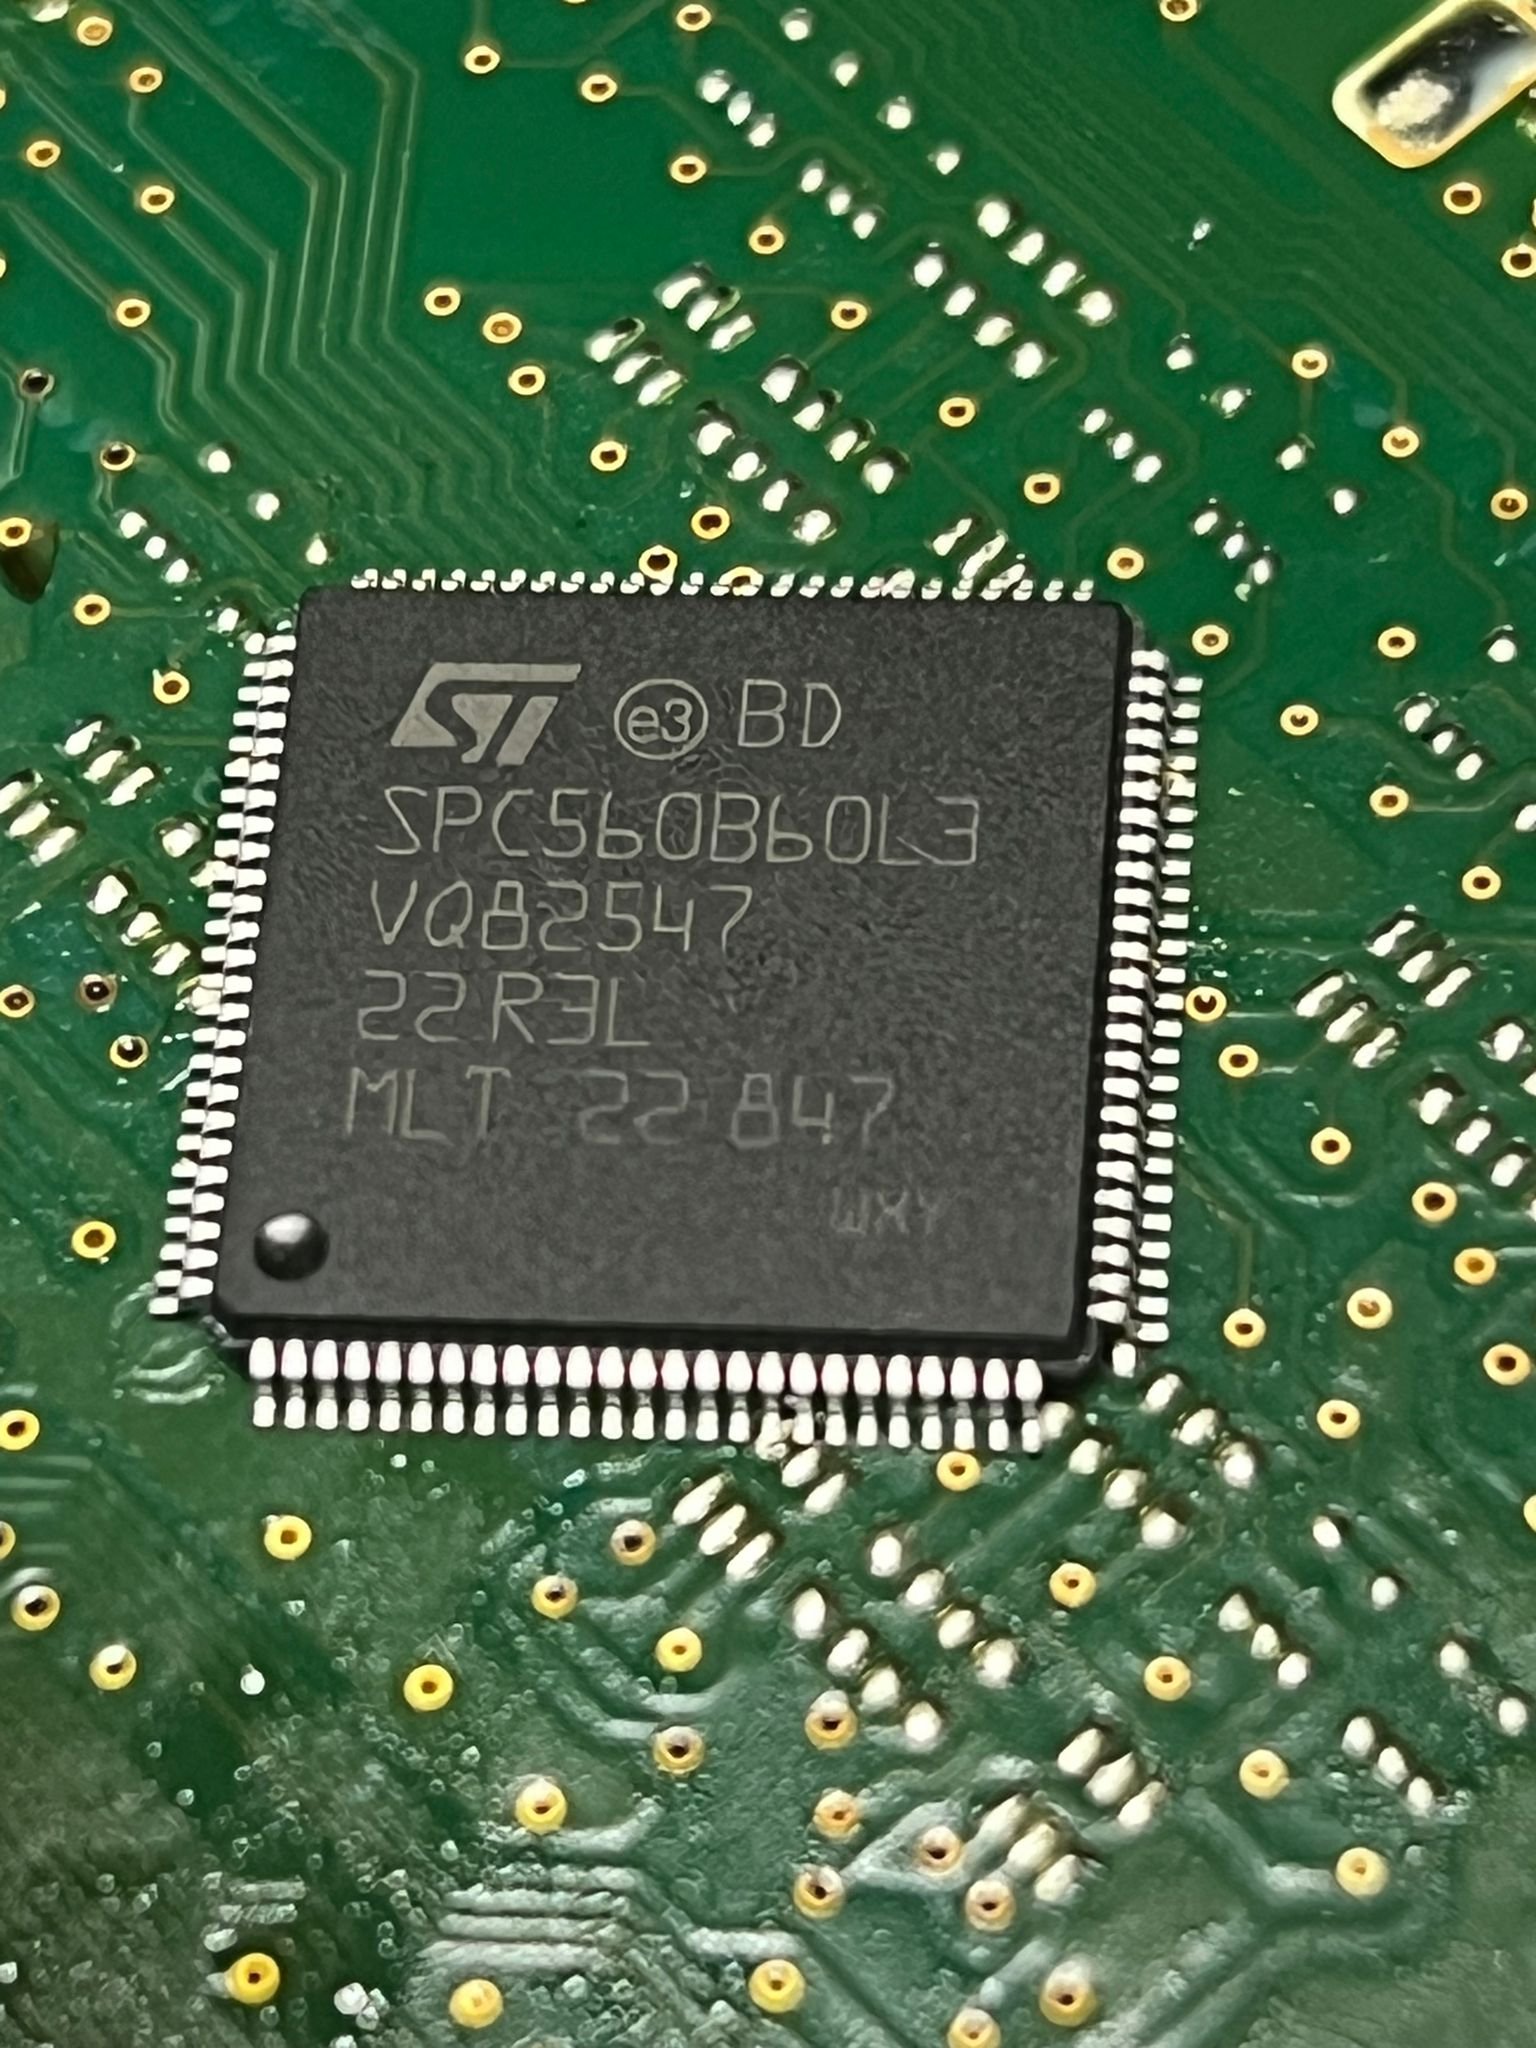
The first step is a physical chip removal. The SPC560B60L3 is a 100-pin LQFP package soldered to the KVM PCB. You must desolder it cleanly without damaging the board pads. Not comfortable with soldering? Buy a pre-virginized KVM module and skip this step entirely.
- Secure the KVM PCB in a PCB holder with the chip facing up.
- Apply no-clean liquid flux around the perimeter of the chip.
- Set your hot air station to approximately 340–360°C with medium airflow.
- Preheat the board area for 30 seconds, then focus the nozzle on the chip leads.
- Once the solder flows, gently lift the chip with fine tweezers. Do not force it.
- Remove excess solder from the pads using solder wick and a fine iron tip.
- Clean the area with 99% isopropyl alcohol and inspect under magnification.
- Check for lifted pads, torn traces, or solder mask damage. Repair if necessary.
Write Virgin EEPROM to the New SPC560B60L3 with the SPC5 Programmer
With the new chip removed from its reel, you will program it using the SX SPC5 programmer and the included chip adapter. This writes the virgin firmware that makes the module a blank slate. Need the virgin .s19 file? Get the EEPROM service here or contact us for the correct file for your specific KVM part number.
- Install the programmer driver by running
PE Drivers_install.exefrom the provided software package. - Insert the SX SPC5 programmer into a USB port. Windows should recognize it as LibUSB-Win32 Devices or Jungo Connectivity USB Multilink (for SPC5+).
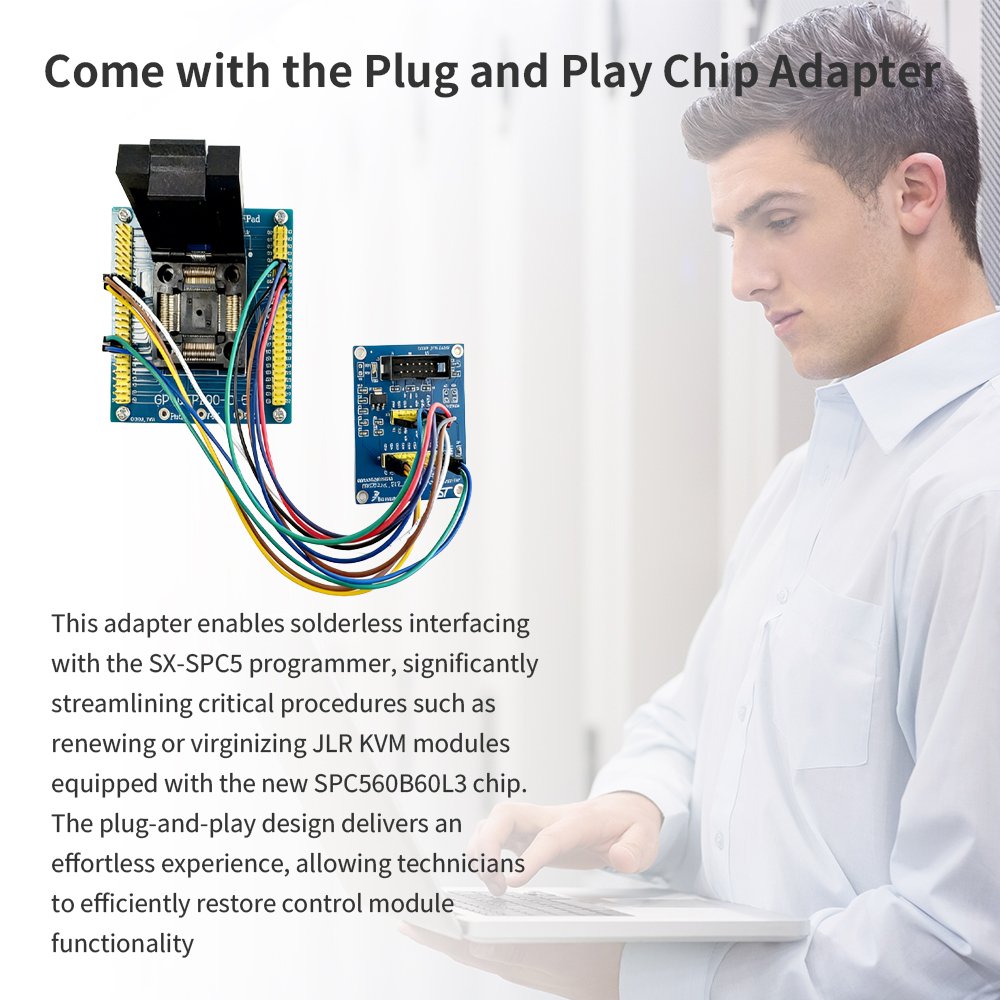
- Place the brand new SPC560B60L3 chip into the SPC5 MPC5 chip adapter. Ensure the adapter lever is locked and the chip is seated flat.
- Open the
PROGPPCNEXUS_Cfolder and launchprogppcnexus.exe. No installation is required. - In the software, select the correct .PCP algorithm for the SPC560B60L3 from the
\Algorithmfolder. - Click Connect (Reset). If the lower-left corner shows the chip ID and model, the connection is successful.
- If you see "Device IDCODE is unknown," check the adapter seating, power LED, and algorithm selection.
- Double-click EM (Erase Module) to erase the blank chip. Wait for "Erased Successfully."
- Double-click SS (Specify Object File) and select the virgin EEPROM .s19 file provided with your kit.
- Double-click PM (Program Module) to flash the virgin data. Wait for "Programmed" confirmation.
- Optionally, double-click SM (Show Module) to verify the written data at the default address.
Solder the New Virginized Chip to the KVM Control Module
With the virgin firmware written, the new chip is ready to be installed back onto the KVM PCB. Precise alignment and clean solder joints are critical. Skip the soldering: Buy a pre-virginized JLR KVM module ready to plug in and sync.
- Apply a thin layer of solder paste to the PCB pads using a fine stencil or syringe.
- Place the new SPC560B60L3 chip onto the footprint, aligning pin 1 with the board marking (dot or notch).
- Double-check orientation. Reversing the chip will destroy it and possibly damage the board.
- Apply liquid flux around the leads. Set hot air to 300–320°C with low airflow.
- Heat from the center outward until the solder paste flows and the chip self-centers.
- Gently press the chip with tweezers to ensure it sits flat. Do not apply excessive force.
- Allow the board to cool naturally. Do not blow air or move the chip while solder is molten.
- Inspect all 100 pins under a microscope or strong magnification. Look for bridges, cold joints, or unsoldered leads.
- Use a fine solder tip and wick to clean any bridges. Touch up any suspect joints.
- Perform a visual continuity check between power and ground pins if you have a multimeter.
Program the KVM & Finish Anti-Theft Synchronization with SX-TOOL
The hardware repair is complete. Now the vehicle must be told to accept the new KVM. This is done through the JET Master SX-TOOL or JET-PRO engineering software, which automates the complex security handshake between the KVM, ECM, and BCM.
- Connect a stable battery maintainer or power supply set to 13.5V. Voltage must remain above 12.5V throughout.
- Install the repaired KVM module into the vehicle and connect all harnesses firmly.
- Connect your JLR DOIP VCI or compatible diagnostic interface to the OBD-II port.
- Launch the JET Master SX-TOOL or JET-PRO software on your laptop and start a new session.
- Navigate to:
Special Functions > Immobilizer and Security > KVM Replacement and Immobilizer Synchronization. - The tool reads the security data from the ECM and BCM. It detects the KVM is foreign (not yet synchronized).
- Click Start Synchronization. The tool will perform an automated handshake that virginizes the KVM's security section and marries it to the vehicle.
- Wait for the progress bar to reach 100%. This typically takes 3–5 minutes. Do not disconnect power or the VCI during this step.
- Once sync is complete, navigate to Key Learning / Add Keys.
- Hold the customer's smart key to the specified location (usually the steering column) and press the button when prompted.
- Repeat for all keys. Verify by testing door lock/unlock, panic, and engine start.
- Clear all DTCs, shut down the vehicle, wait 60 seconds, and perform a final functional test.
KVM Renewal — Full Workflow Summary
The complete KVM renewal process from diagnosis to delivery. Bookmark this checklist for your next workshop job.
- Diagnosis: Confirm the KVM failure with Pathfinder or SX-TOOL diagnostics. Look for "No Communication" with KVM, "Smart Key Not Found," or U0155 / U0167 DTCs.
- Sourcing: Match the KVM part number exactly (e.g., FK72-19H440-CA). Use a donor module from the same vehicle year and specification. Or buy a pre-virginized unit to skip steps 1–3.
- Desolder: Remove the used SPC560B60L3 chip from the KVM PCB using controlled hot air (340–360°C). Clean pads thoroughly.
- Program: Insert a new SPC560B60L3 chip into the SPC5 adapter. Flash the virgin EEPROM .s19 file using PROGPPCNEXUS. Verify the write.
- Solder: Reflow the new virginized chip onto the KVM PCB. Inspect all 100 pins for bridges or cold joints.
- Install: Fit the repaired KVM back into the vehicle. Connect all harnesses and verify power/ground.
- Synchronize: Use JET Master SX-TOOL or JET-PRO to run KVM Replacement and Immobilizer Synchronization. Keep voltage above 12.5V.
- Key Learning: Add all keys through the Key Learning function. Test every key fob for lock/unlock, panic, and engine start.
- Clear DTCs: Run a full diagnostic clear. Perform a sleep cycle (60 seconds) and retest all functions.
- Delivery: Hand the vehicle back to the customer with a working immobilizer system and saved receipt.
How to Virginize a JLR DCDC 48V–12V Converter with the SPC5 Programmer
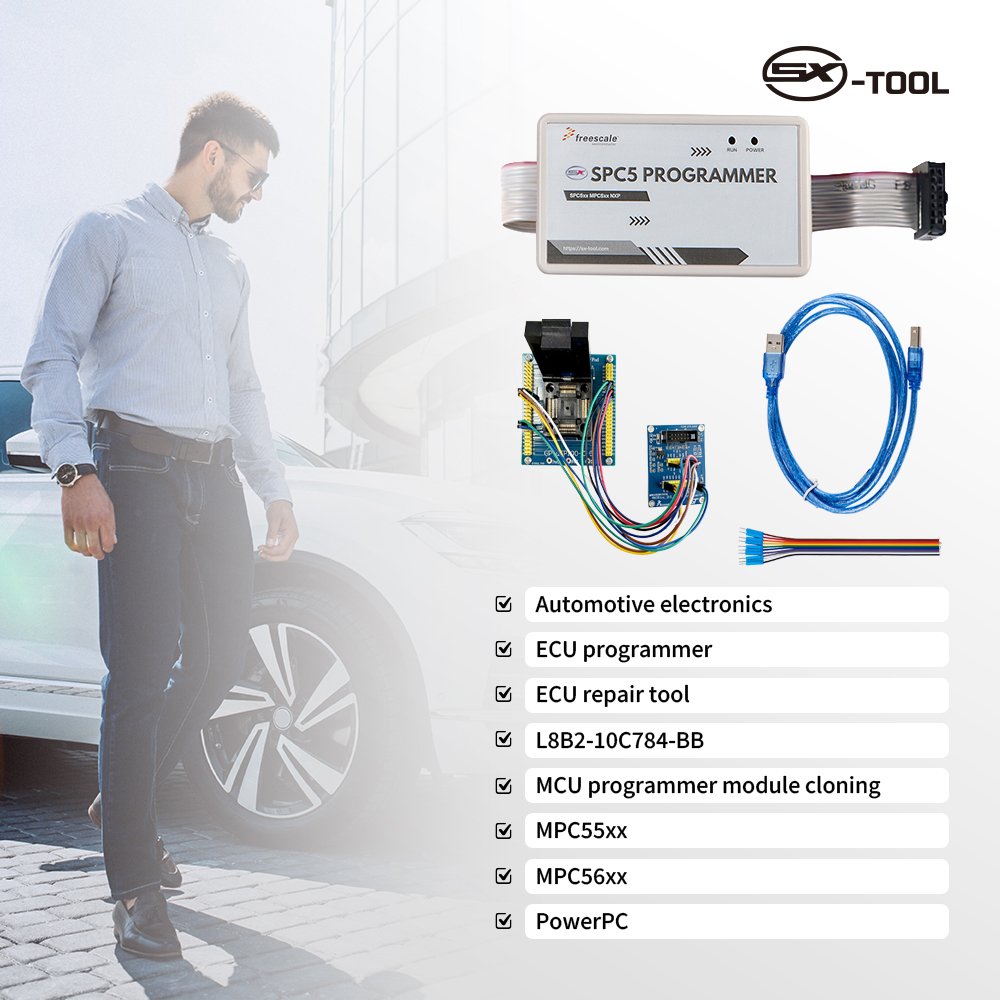
The JLR 48V mild-hybrid DCDC converter (L8B2-10C784-BB) uses the same SPC560B60L3 MCU family. When the converter fails, dealer replacement costs exceed $1,500. With the SPC5 programmer, you can renew the module in-house.
Why DCDC Converters Fail
The 48V lithium battery system powers the mild-hybrid starter-generator. The DCDC converter steps 48V down to 12V for the vehicle's conventional systems. Common failures include MCU corruption, overheating, and water ingress.
Same Chip, Same Process
The DCDC converter also uses the SPC560B60L3 or compatible MPC56xx MCU. The virginize procedure is nearly identical to the KVM: desolder the chip, flash virgin EEPROM, solder a new chip, and reinstall.
No Dealer Coding Required
Unlike the KVM, the DCDC converter does not require immobilizer synchronization after chip replacement. Once the virgin firmware is written, the module self-initializes when powered on.
Remove the DCDC Converter from the Vehicle
Disconnect the 48V and 12V battery terminals before working on the DCDC. The converter is typically located near the 48V battery pack or under the rear load floor.
- Wear insulated gloves and use insulated tools. 48V systems can deliver lethal current.
- Disconnect the negative 48V battery terminal first, then the 12V negative terminal.
- Remove the DCDC converter module and place it on an ESD-safe mat.
- Remove the aluminum housing cover to expose the PCB.
Connect the SPC5 Programmer to the DCDC PCB
Instead of desoldering the chip, you can often program the DCDC MCU directly on the board using the JTAG/Nexus interface. Use the same SPC5 programmer with the correct wiring.
- Locate the JTAG test points on the DCDC PCB. These are usually labeled or accessible via a debug connector.
- Connect the SPC5 programmer ribbon cable using the following pinout:
- Ensure the DCDC board is externally powered (12V) before connecting the programmer. The red LED on the SPC5 must light up.
- Remove the JP2 jumper cap on the programmer to avoid power supply conflicts.
- Launch PROGPPCNEXUS and select the correct algorithm for the DCDC MCU model.
- Click Connect (Reset) and verify the chip ID is recognized.
Read, Erase, and Write Virgin DCDC Firmware
With the programmer connected, you can now back up the existing data, erase the chip, and write the virgin DCDC firmware.
- Backup: Double-click UM (Upload Module) to read the existing firmware. Save the .s19 file as a backup before any erase operation.
- Erase: Double-click EM (Erase Module) to clear the chip. Wait for "Erased Successfully."
- Write: Double-click SS (Specify Object File) and select the virgin DCDC firmware .s19 file.
- Program: Double-click PM (Program Module) to flash the virgin data. Wait for "Programmed" confirmation.
- Verify: Double-click SM (Show Module) to verify the written data at the default address.
Reinstall and Test the DCDC Converter
After programming, the DCDC is ready for reinstallation. The virgin firmware will self-initialize when the module receives power.
- If you removed the chip, solder a new virginized chip back onto the DCDC PCB and reassemble the housing.
- If you programmed in-circuit, disconnect the programmer carefully and verify no solder bridges remain.
- Reinstall the DCDC converter in the vehicle. Reconnect all 48V and 12V harnesses.
- Connect the 12V battery first, then the 48V battery. The DCDC should initialize automatically.
- Use a multimeter to verify the 12V output is stable (13.5V–14.5V) with the ignition on.
- Check for DTCs using Pathfinder or SX-TOOL. Clear any stored codes and perform a functional test.
Get the Tools to Do This Job Today
Every product below is tested and approved for JLR KVM renewal. We ship worldwide with same-day dispatch on orders placed before 3 PM.
JET-PRO JLR Coding Tool
- Live data reading Supported
- ECU programming Supported
- Feature activation Supported
- KVM sync wizard Included
- ENET / DoIP Compatible
JET Master SX-TOOL
- KVM Replacement wizard Included
- Immobilizer sync Auto
- DoIP 2017–2026 Full support
- Key programming All keys lost
- CCF editing Built-in
- Module coding Complete
- Priority support Included
JET-LS Key Programming
- Key programming All keys lost
- KVM / BCM sync Supported
- Remote coding Via ENET
- 2010–2026 coverage Wide range
- Dealer-level functions Included
You May Also Need for KVM Jobs
Complete your workshop setup with these proven JLR products that pair perfectly with the KVM renewal workflow.
SPC5 Programmer + SX-TOOL / SX-CAN KVM Module Programming
After hardware chip replacement, the SPC5 programmer works hand-in-hand with SX-TOOL and SX-CAN software to complete the full KVM programming workflow — from virgin chip flashing to immobilizer sync and key learning.
Flash the Virgin Chip with SPC5 Programmer (Offline)
The SPC5 programmer handles the physical chip-level work. This is done on the bench before the KVM is installed in the vehicle.
- Remove the used SPC560B60L3 chip from the KVM PCB and place it in the SPC5 MPC5 chip adapter.
- Insert a brand new SPC560B60L3 chip into the adapter socket. Lock the lever and verify the chip is seated flat.
- Connect the SPC5 programmer to your PC via USB. Launch
PROGPPCNEXUS.exe. - Select the SPC560B60L3 algorithm from the
\Algorithmfolder. - Click Connect (Reset) and confirm the chip ID is recognized in the lower-left corner.
- Double-click EM (Erase Module) to clear the chip. Wait for confirmation.
- Double-click SS (Specify Object File) and load the virgin KVM EEPROM .s19 file.
- Double-click PM (Program Module) to write the virgin data. Wait for "Programmed" confirmation.
- Use SM (Show Module) to verify the data was written correctly at the default address.
Install the KVM and Sync with SX-TOOL (OBD)
With the virgin chip soldered to the KVM PCB, install the module in the vehicle and use SX-TOOL to perform the immobilizer synchronization via OBD.
- Connect a stable battery maintainer (13.5V). Do not skip this — voltage drops during sync will brick the process.
- Install the KVM module and connect all harnesses firmly.
- Connect your JLR DOIP VCI to the OBD-II port.
- Launch SX-TOOL and start a new session with the correct vehicle profile.
- Navigate to:
Special Functions > Immobilizer and Security > KVM Replacement and Immobilizer Synchronization. - The tool detects the KVM is foreign (virgin). It reads the security seeds from the ECM and BCM.
- Click Start Synchronization. The tool performs an automated handshake that writes the vehicle's security data to the KVM.
- Progress completes in 3–5 minutes. Do not disconnect power or the VCI.
Program Keys with SX-CAN or SX-TOOL (OBD)
After synchronization, the KVM is paired with the vehicle but does not know any keys yet. Use SX-TOOL or SX-CAN to learn keys.
- Launch SX-TOOL and navigate to
Key Learning > Add KeysorAll Keys Lostdepending on the situation. - For Adding a Spare Key: Select "Add Keys." The system will detect existing keys. Hold the new key to the specified location and press the button when prompted.
- For All Keys Lost (AKL): Select "All Keys Lost." The system clears the key database and starts fresh. Program each key one by one.
- With SX-CAN: Connect via ENET cable and use the CAN-based key programming function. This works for older vehicles (2010–2017) that do not use DoIP.
- Test every key for door lock/unlock, panic, proximity unlock, and engine start authorization.
- Clear all DTCs, perform a sleep cycle (60 seconds), and verify no immobilizer warnings remain.
JLR Key Programming Case Studies
Real-world examples from workshops using the SPC5 programmer + SX-TOOL / SX-CAN workflow to solve JLR immobilizer and key programming problems.
All Keys Lost — 2018 Range Rover Velar (L560)
Problem: Customer lost all keys for a 2018 Range Rover Velar. The vehicle was completely immobilized. The dealer quoted $2,400 for a new KVM, two keys, and programming, with a 4-week lead time.
- Technician: Sourced a used KVM from a matching donor vehicle (same part number: FK72-19H440-CA).
- Hardware: Removed the used SPC560B60L3 chip from the donor KVM and replaced it with a new virgin chip using the SPC5 programmer and chip adapter.
- Flash: Wrote the virgin EEPROM .s19 file to the new chip using PROGPPCNEXUS. Verified the write with SM (Show Module).
- Sync: Installed the KVM in the Velar and connected a JLR DOIP VCI. Launched SX-TOOL and ran KVM Replacement and Immobilizer Synchronization.
- Keys: Used SX-TOOL All Keys Lost function. Programmed two new smart keys in under 10 minutes.
- Test: Both keys unlocked doors, activated panic, and started the engine. No DTCs remained.
Add Spare Key — 2015 Discovery Sport (L550)
Problem: Customer had one working key but wanted a spare. The dealer quoted $680 for a single key and programming.
- Vehicle: 2015 Discovery Sport, CAN-based system (pre-DoIP).
- Tool: Connected an ENET cable and launched SX-CAN software.
- Process: Selected Key Learning > Add Key. The system read the existing key data and prepared the KVM to accept a new key.
- Programming: Held the new aftermarket key fob to the steering column and pressed the lock button when prompted. The key was learned in under 30 seconds.
- Verification: Tested lock/unlock, engine start, and remote start. All functions worked perfectly.
Used KVM Replacement — 2020 Jaguar F-Pace (X760)
Problem: Vehicle displayed "Smart Key Not Found" intermittently, then permanently. Scan revealed "No Communication" with the KVM. The KVM was internally damaged due to water ingress.
- Diagnosis: Used Pathfinder to confirm KVM failure. BCM was healthy, ECM was healthy, but KVM showed U0155 (Lost Communication With KVM).
- Hardware: Sourced a used KVM from a 2020 F-Pace salvage unit with the same part number. The KVM was known-good but married to the donor vehicle.
- Chip Swap: Removed the original SPC560B60L3 from the faulty KVM and replaced it with the donor KVM's chip after virginizing it with the SPC5 programmer.
- Alternative: Technician also considered buying a pre-virginized KVM but chose to renew the donor unit to save cost.
- Sync: Installed the repaired KVM and used SX-TOOL KVM Replacement wizard. The sync completed in 4 minutes.
- Keys: Customer's original keys were still present. Used Add Key to re-learn both keys. No new keys were needed.
SX-TOOL vs SX-CAN vs JET-LS — Which One Do You Need?
Three software platforms for JLR programming, each with different strengths. Choose the right tool for your workshop's focus.
Choose SX-TOOL (JET Master)
If you run a specialist JLR workshop doing diagnostics, coding, retrofits, and module repairs. It is the most complete tool with the KVM Replacement wizard and full CCF editing. Buy JET Master →
Choose SX-CAN
If you primarily work on older JLR vehicles (2010–2017) and need an affordable solution for coding, flashing, and basic key programming via CAN bus. Learn More →
Choose JET-LS
If you are a locksmith focused on key programming and immobilizer work. It covers the widest vehicle range and is optimized for All Keys Lost and KVM/BCM sync tasks. Buy JET-LS →
Frequently Asked Questions
Common questions from locksmiths and repair shops about the KVM renewal process.
The SPC560B60L3 is an STMicroelectronics automotive-grade 32-bit Power Architecture microcontroller. In Jaguar Land Rover (JLR) vehicles, it serves as the main MCU inside the Keyless Vehicle Module (KVM) or Remote Frequency Hub (RFA), managing immobilizer, keyless entry, and passive start functions.
No. The SPC560B60L3 contains OTP (one-time programmable) memory with vehicle-specific security data. Once programmed to a specific vehicle, it cannot be rewritten to a virgin state through OBD alone. To reuse a used KVM module, you must physically replace the SPC560B60L3 chip with a new one and write a virgin EEPROM file.
You need the PROGPPCNEXUS software (included with the SX SPC5 programmer) running on a Windows PC. The software provides the algorithm files (.PCP) for the SPC560B60L3 and allows you to read, erase, and write the chip's flash and EEPROM memory.
After hardware replacement, you still need to perform anti-theft synchronization and key programming. SX-TOOL provides a specialized KVM Replacement wizard that automates the immobilizer handshake. Some users also pair it with Pathfinder for full module configuration, but SX-TOOL can handle the core synchronization.
For an experienced technician, the hardware work (chip removal and replacement) takes 20–30 minutes. Programming the new chip with the SPC5 programmer takes 5–10 minutes. The SX-TOOL anti-theft synchronization and key learning takes another 10–15 minutes. Total workshop time is well under one hour.
This procedure works on Jaguar Land Rover vehicles that use the SPC560B60L3-based KVM / RFA modules, including 2018+ Range Rover Sport, Range Rover Velar, Discovery Sport, Discovery 5, Defender (2020+), and Jaguar F-Pace, E-Pace, and XE/XF models with the same module architecture. Always match the part number before ordering.
This is an advanced repair that requires SMD soldering skills, hot air rework experience, and basic automotive diagnostics knowledge. If you are not comfortable with fine-pitch QFP soldering, we recommend practicing on scrap boards first or outsourcing the soldering to a board-level repair specialist.
If you already own the SPC5 programmer and a source for new chips, you can purchase the virgin EEPROM .s19 file separately from our shop. The file is calibrated specifically for the SPC560B60L3 in JLR KVM applications.
Related Guides & Resources
Expand your JLR engineering capabilities with these in-depth tutorials and product reviews.